How to Use Petg Roll Effectively in Your 2026 Projects?
In the rapidly evolving landscape of 3D printing, the Petg Roll has emerged as a popular choice due to its unique properties. This thermoplastic is known for its strength, flexibility, and resistance to impact. It is an ideal material for various projects, offering a balance between durability and ease of use. However, effectively utilizing Petg Roll in your 2026 projects requires a deep understanding of its characteristics and limitations.
Many users struggle with the proper settings for extrusion and temperature. This can lead to under-extrusion or even print failures. Adjusting the printer parameters is crucial. A well-calibrated 3D printer can make a significant difference. Users often overlook the importance of bed adhesion when working with Petg Roll, which can cause warping and layer separation.
Learning to optimize your approach with Petg Roll is essential. Engaging in trial and error can yield valuable insights. Effective usage also means knowing when that extra flexibility is not needed. Understanding the material will enhance your overall printing experience. By doing so, you restore confidence in your projects and harness the true potential of Petg Roll.
Understanding PETG Roll: Properties and Advantages
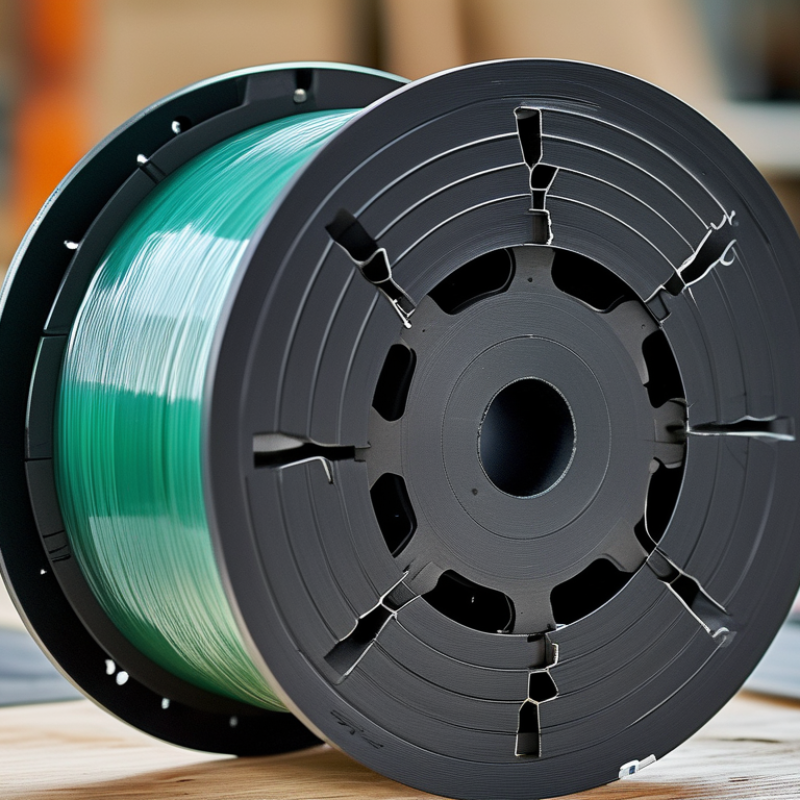
PETG, or Polyethylene Terephthalate Glycol, is a thermoplastic that offers impressive properties for various applications. Its clarity and strength make it suitable for clear designs and functional prints. One of its key advantages is impact resistance. PETG can withstand significant stress without breaking. This makes it an excellent choice for both industrial and consumer products.
Its ease of processing is another appealing feature. PETG does not warp easily and adheres well to most surfaces. This makes it a reliable option for large prints. However, users should be mindful of its temperature sensitivity. It can deform under high heat, potentially affecting the final product's integrity. This aspect requires careful planning in projects.
When using PETG rolls, consider your project's specific needs. Its flexibility allows for a variety of designs, but it's crucial to ensure the correct printer settings. Testing with small prints can prevent larger mistakes. Aspiring creators should embrace the learning curve. With practice, the potential of PETG can be fully realized.
Preparing Your Workspace for PETG Printing
Preparing your workspace for PETG printing can greatly enhance your project outcomes. According to industry reports, over 70% of 3D printing failures arise from inadequate setup. Ensuring a clean and organized workspace is essential. Keep surfaces clear to prevent dust accumulation, which can affect print quality.
Temperature control is crucial when working with PETG. Maintain a stable environment, ideally between 20°C and 25°C (68°F to 77°F). Fluctuations in temperature create inconsistent extrusion, leading to poor adhesion. Utilize a dedicated printing area to minimize disruptions.
Tip: Invest in a quality enclosure. This controls temperature fluctuations and improves print accuracy.
Lighting is another important aspect. Adequate lighting allows for precise calibration and monitoring of print progress. Insufficient light can lead to errors in setup, impacting the final product. Additionally, regularly inspect and maintain your 3D printer. Dust buildup on the nozzle can affect flow rates.
Tip: Clean the nozzle after every few prints to maintain optimal performance.
How to Use Petg Roll Effectively in Your 2026 Projects? - Preparing Your Workspace for PETG Printing
| Workspace Element |
Description |
Importance |
Recommended Actions |
| Printer Setup |
Ensure your 3D printer is compatible with PETG. |
High |
Check for nozzle size, temperature settings, and bed adhesion methods. |
| Environment Control |
Maintain optimal temperature and humidity levels. |
Medium |
Use a controlled environment with minimal drafts. |
| Material Storage |
Store PETG in a cool, dry place to prevent moisture absorption. |
High |
Use airtight containers or desiccants. |
| Print Bed Preparation |
Prepare the print bed with appropriate materials for adhesion. |
High |
Consider using glue stick or PEI sheets. |
| Safety Measures |
Ensure proper ventilation and protective gear. |
Medium |
Use gloves and goggles when handling material. |
Setting Up Your 3D Printer for PETG Roll Usage
Setting up your 3D printer for PETG roll usage requires careful attention to detail. Start by ensuring your printer's nozzle temperature is between 230°C and 250°C. This range helps with PETG's adhesive properties. An inappropriate temperature can lead to stringing. Fine-tune your retraction settings to reduce this problem.
The bed temperature should be set at 70°C or higher for effective adhesion. A clean bed surface is essential. Use a suitable adhesive or tape for better grip. Keep in mind that bed leveling is crucial. An unlevel bed can cause warping. Always perform a test print to verify settings.
Consider environmental factors too. PETG is sensitive to humidity, which can affect quality. Store your rolls in airtight bags with desiccants. Regular maintenance of your printer will ensure optimal performance. Watch for clogs in the nozzle and check the filament path for blockages. Experiment with prints to refine your process. Adjusting settings can lead to improvements, but it may take time to achieve consistency.
Tips for Achieving Optimal Print Quality with PETG
PETG, or polyethylene terephthalate glycol, is a popular choice for 3D printing due to its durability and ease of use. Achieving optimal print quality with PETG requires careful attention to several factors.
Start by setting the right temperature for your printer. Most users find success between 220-250°C. However, each printer varies, so it’s essential to test within this range.
Print speed is also crucial. Slower speeds often deliver better results with PETG. Aim for around 30-50 mm/s. The material can be stringy, so tweaking retraction settings may help reduce this. Watching the first layer is critical too. A well-adhered first layer means a solid foundation for your print.
Another common issue is warping, which can happen even with PETG. Leveling the print bed carefully helps prevent this. If you notice poor adhesion, consider adding an additional adhesive layer. Experimenting with fan speeds is also beneficial.
Too much cooling can lead to layer separation. Balancing these elements will enhance your prints. Reflecting on your process can lead to improved quality.
Post-Processing Techniques for PETG Printed Projects
When working with PETG for your projects in 2026, post-processing techniques are crucial. PETG, known for its strength and flexibility, requires careful finishing to enhance its appearance and durability. According to a study by the Additive Manufacturing Association, 65% of users report improved results when employing post-processing methods.
Sanding is a common technique for PETG. It helps to smooth out layer lines and imperfections. Start with a coarser grit, then progress to finer grits for a polished finish. Be cautious; excessive sanding can weaken the structure. Another effective method is chemical smoothing, which uses solvents to enhance surface quality. However, precise application is essential, as overexposure can lead to warping.
Painting PETG can also transform your project. Choose paints designed for plastics for the best adherence. Surface preparation is key; clean the print thoroughly before applying paint. Studies show that properly prepped surfaces can increase paint adhesion by up to 50%. Balancing these techniques can be challenging, but informed decisions yield impressive results.
 1Durch die gruppenweite Einführung und Harmonisierung unseres integrierten Managementsystems (IMS) werden alle bestehenden Unternehmens-, Qualitäts-, Umwelt- und Energiepolitiken durch diese Unternehmenspolitik ersetzt. Der Slogan „Textil hat Zukunft – auch in De